Saturday, April 30, 2011

Making Your Own Composting Bin

Making Your Own Composting Bin: "It's the first Wednesday of the month, and that means it is a themed Works for Me Wednesday this week! The theme for this week is 'Best Tips.' So, I picked one of my favorite money saving tips that I have posted about before (but not with so much detail), and help all of you out there who are hoping to start your own composting bin this year!

About a year ago, I was frustrated that I couldn’t find an inexpensive composting bin on the Internet or at local stores, I set out to make my own. This project ended up running me around $15, and was completed in less than five minutes!

I will be the first to admit that it probably doesn't work as well as a $150 composter that you can buy. But, for a tenth of the money, I'm willing to have a less efficient composter.

Materials Needed:
· Large trash can with lid that locks on
· Platform of some sort (I used a wooden plant stand on wheels)
· Screws (to attach platform to trash can)
· Drill with large drill bit

Directions:

1. Using your drill, make holes along the sides of your trash can, as well as on the lid and on the bottom of the trash can. Our trash can turned composting bin has approximately 20 - 25 holes total.

2. Again using your drill, attach the platform to the bottom of your bin. Make sure that you do not cover up the holes that you have made on the bottom of the bin. (Or, if you need to, just drill a few more holes in the bottom.) This platform will help to allow drainage from the composting bin, as well as to save the grass underneath your bin.

3. Collect some of the items on the Environmental Protection Agency's approved list for composting, and start composting!

4. Every couple of days, go out to the yard and put your trash can on its side. Roll it around the yard for a couple of minutes.

5. Add more items from the approved list, as you produce them.

6. When desired, use the rich, dark soil that has been produced! By the end of summer, we were able to supplement a new portion of our garden with the summer’s worth of “trash” that would have found itself in the landfill, if it hadn’t been for our $15 investment!




"

Seven Or So

  1. I watched a repeat of THE WEDDINGPrince William, Kate Middleton and thought it was lovely.
  2. The sun is shining and it looks to be a beautiful day.
  3. I have set my seedlings out, will be planting them tomorrow.  So exciting.
  4. I have asked for a propane grill that can be converted to natural gas for Mother's Day.  Not really very mother's day like but we could use it and my DH has said he would like one.  Am I a good wife or what? Hopefully one of the boys will send me a nice card or some flowers.
  5. I want to buy tickets to the NASCAR race in June for DH and our youngest for Father's Day.  Gotta see if DH will agree to that expenditure though.
  6. I do not like how prices in the grocery store are going up.  I am trying to stock up on some things we buy frequently that will store, but even the sale prices aren't that good.
  7. I am really enjoying the Bible Study I am doing with me friend.  The subject matter for the final day of study for this week was The Mass.  This isn't a Catholic Bible Study, but I was able to tell my friend that the entire chapter was The Mass and it was awesome.  Glory be to God.

Top 150 Makers Blogs

Top 150 Makers Blogs: "


There are hundreds of great inspiring and creative blogs to read, but do you ever wonder which blogs everyone else is reading? I do, which is why I have compiled a list of the top 150 design, inspiration, and DIY blogs – I call them all Makers.

The blogs are measured and ranked based on 5 criteria (Alexa rank, Compete traffic, Google Pagerank, Google Reader subscribers, Yahoo! inlinks). Scroll down to the bottom of the list to see specifics on how the list was compiled.

This list certainly isn’t perfect. Each of the 5 criteria have their quirks. However, I do think this mashup is a step in the right direction of creating better lists. Because of these quirks, one blogger has requested to be removed from the rankings, which is noted in the list.

>> SEE THE LIST


"

Wednesday, April 27, 2011

I Am So Excited

What am I so excited about?  About the opportunity to read this new ebook  about cleaning the Mary and the Martha way. The adorable Sarah Mae has prepared this teaching tool for our hearts and our homes.  I'd encourage everyone to head over to her website to get it right now.

It looks like she is hosting a challenge soon as well, so it is the perfect time to pick this book up!

31 Days to Clean Group Challenge!

Anti Inflammatory Diet Information

http://coolinginflammation.blogspot.com/2008/09/anti-inflammatory-diet.html

Frugal and Me

So, I've been trying to be more frugal of late.  This endeavor came about kind of backwards.  I am pretty ADD so I have lots of ideas but the follow through is greatly lacking because. . .well, I have another idea.  Anyway, I got really sick after years of not feeling very well.  The really sick period from October to March caused me to s l o w  w a y down.

 In slowing down,  I stayed home and did only the bare minimum in errand running. Like take son to school and do one thing -- replace the gallon of milk we needed, pick up a prescription or make a bank deposit. Then it was home and in bed for me.  By staying home, I had no need to run through the drive through for a diet coke (that can add up), no stops at Target or WalMart for "a few things" which ended up being $60.00 worth of stuff that we didn't necessarily need but was oh so cute, cheap, trendy whatever then stop in at a restaurant because I was hungry and hadn't planned to spend so much time out, hand nothing ready at home  s o o o o I'll just eat here or here or here.

We recently purchased a new car, I mean a NEW car with like 8 miles on the odometer when I drove it off the lot.  It was really hard to watch when the mileage turned over 100 miles, then 500 miles and now it is up to 1700 or so.  However, if I was not still staying home more as I learned to do when I was sick, I would have put SO many more miles on the car just aimlessly running hither and yon having fun running errands that really weren't necessary.

If anyone else has that, "I gotta get out of the house and do something feeling", you might want to look at how much money you are spending each time you go out.  You may very well be able to save enough money over the course of a few months to make a special and substanstial purchase you have been dreaming of, or you may be able to pay off a bill that has been hanging over your head, or start saving for retirement like you have been wanting too.  I know this has been a real eye opener for me.  While I am not glad I got sick, I am glad of some of the clarity that I gained during the time period.  Additionally, you know how much gas prices have gone up, I shudder to think I much gas I would have burned through!

Real Solutions – New!

This Will Be Very Helpful

Real Solutions – New!: "

Tuesday, April 26, 2011

Planted in My Garden

So, I spent some time identifying my seedlings, see my Did I Mention post.  I found out that:

  1. This one is Lettuce 
  2. This one is Parsley 
  3. This one is a Carrot   
  4. This one is Spinach 
  5. This one is Red Pepper 
  6. This one is Brocoli  
  7. This one is Kale  
  8. This one is Swiss Chard 
  9. This one is Onion 
  10. and this one is Squash
I will not make this mistake again next year that is for sure.  I will, I am sure, make a different mistake though.

Bean Art Tutorial

WOW! Dare I Try Something Like This - Might Be a Fun Hot Summer Day Project

Bean Art Tutorial: "

In the original picture, there was no black, but there are also no dark green beans. So I decided to just add in the black beans and I am really glad I did because it helped to define the picture a lot better then if I would have just left the dark green. The frame recieved a coat of black spray paint and then ta-da! It's finished! Very carefully place the artwork back into the frame. You will have some beans fall off of the picture while you do this. Try not to cry (too much) because it can easily be fixed.


There you have it! A large accent piece that can be customized to any taste and room.


Home-Ec 101 in the Comfort of Your Own Home

Sounds Like I Need To Get This Since I Know Little To Nothing About Home Ec

Home-Ec 101 in the Comfort of Your Own Home: "

Home Ec 101 BookI’ve been pretty open about my prior complete lack of domestic skills, and the fact that it’s an area that I’ve really been trying to grow in over the last few years. Given this, I was thrilled to be given the chance to review the book Home-Ec 101: Skills for Everyday Living by Heather Solos. It’s like taking a Home-Ec 101 class from the comfort of your own home!


The book is broken up into sections called Cook It, Clean It, Fix It, and Wash It. I really enjoyed each section of the book, and couldn’t believe how many times I said, “Hey Eric – listen to this!” (I did most of my reading while we were on a car trip.) Some of these mentions included me saying things like, “Did you know we’re supposed to clean (whatever)?” To which he would say something like, “Uh…no.” Luckily, not only did we now know that we had to clean things we didn’t even know we had, but there were also directions.


One of the ones I was most excited about was the shower drain. We’ve been having trouble off and on with a funky smell in our bathroom. After not figuring out where it was coming from for a while, we finally wondered about the shower drain. Imagine my delight to read about it in the book, complete with directions on the best way to clean it out.


There were so many wonderful tips and gems that I found throughout the book — I can’t wait to try them all out. I have already been implementing some of her laundry tips, and I’m seeing some nice results. I plan on trying some more tips from throughout the book soon, and I’m positive that this will be one of those books that I pull off the bookshelf from time to time when I need to read about how to do something around the house.


I love the conversational tone of Heather’s book, as well as all of the humorous remarks throughout. Who knew I would laugh so many times while reading a book called Home-Ec 101: Skills for Everyday Living? How can you go wrong with a book that quotes Sheldon Cooper and the Choppin’ Broccoli song from Dana Carvey?


I think this book would be an amazing gift to give to someone who is newly starting a household, as a wedding shower gift, to someone leaving home for the first time, or for a friend or relative who struggles in this area. (Of course, it would be best if that last one was also someone that you knew would appreciate it and not take it as a hint that you think they are Home Ec Challenged.)


Is there an area of Home Economics that you feel like you lack skills? What is something that you would like to learn how to do (or just do better)?


7 Quick Takes: April 21, 2011 (Vol. 78)

~Paul Mitchell Quick Slip - recommended for hair like mine, blogger said that it cuts drying time. Awesome!
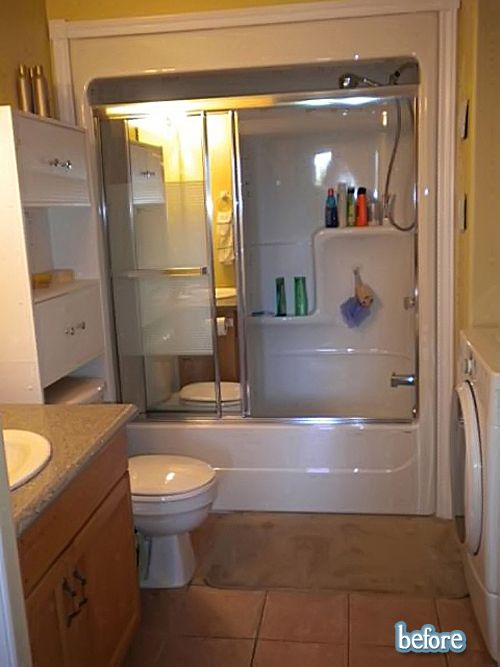
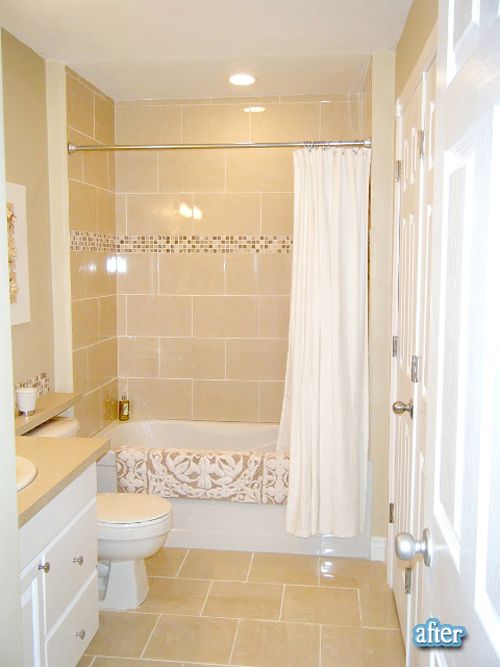
Black Hole Bathroom

Need To Show This To My Hubby as I LOVE This

Check it out on her blog Home Sweet & Savory. Great job Rachel!


Tiffany Blue Dresser Makeover

This Takes My Breath Away

Tiffany Blue Dresser Makeover: "


"

Oh My, Chocolate Pudding!

http://www.bakersroyale.com/fast-and-easy/baking-basics-how-to-make-homemade-pudding/

Monday, April 25, 2011

Any-Size Bag Tutorial

This Is Exactly What I Have Been Looking For

Any-Size Bag Tutorial: "
If you are wanting a simple bag tutorial, this is it! You can use these guides to make any size bag. I've completed two and am working on a third; all different sizes.

First, gather supplies.

You will need two coordinating fabrics; one for the outside (I used a thicker fabric for the outside) and one for the inside (I used a quilter's cotton); interfacing, a magnetic snap, and webbing for the handle.


Next, cut two panels from each fabric and from the interfacing. All of these panels need to be the same size. For this particular bag, I made my panels 10" high by 12" wide.


Iron the interfacing to the back of the outside fabric panels.


Pin fabric together with the patterned sides facing each other. (Pin inside fabrics to each other; pin outside fabrics to each other.)


Sew around three sides, leaving the top open.


For the inside fabric, leave an opening in the bottom. My opening was about 4 inches. This is how you will turn the bag right-side out.


Next, make a gusseted bottom by folding the seam over to make a triangle in each corner. Line up the seams. Determine how wide you want your bottom (mine was 4 inches) and mark the edge.

Pin your corner.


Sew along the marked line. I went back over my line a couple of times to reinforce the stitch.


Trim off the excess.


You should now have two inside-out bags, looking somewhat like this.


Now is the time to put the magnetic snap in.


Determine where you want the snap. Remember to leave enough space at the top because you still have to sew to bags together and finish with a stitch around the top. Press the snap into the fabric to make indentations in the fabric (this step works best on carpet). Cut slits in the fabric and push your snap in.

This is what it s like from the inside of the bag.


Cut a small rectangle of cardboard to reinforce the snap. Slide the little metal disc on and bend the flaps back. All of these instructions are included on the packaging for the snap.


Next, pin the handles to the outside fabric where you want them positioned.


turn your liner right-side out and set down into the bag. The "good sides" should now be touching. The pictures really explain this step better than I can.

Pin the liner to the outside. Make sure your handles are tucked down and out of the way.


Sew around the entire top. I triple stitched across the handle straps to reinforce them.


Now, carefully turn your bag right-side out from the small hole in the bottom of the liner.


This is what you should have.


Hand stitch the hole. Don't worry if this doesn't look very appealing... How often do you actually see the bottom of the inside of your bag?


Set the liner down into the bag.


Pin around the top.


Stitch all the way around your bag.


There you have it!


I added a fabric rosette.


This is another bag made from the same instructions. The starting panels were 12"x20" for this one, making the finished bag about 9"x15"x4".

I'm linking this to my favorite linky parties this week!
"