Showing posts with label gardening. Show all posts

Wednesday, August 17, 2011

Give Away: Back Yard Food Production!


I found out about this DVD resource at Homestead Revival where Amy is offering a chance to actually win the thing! Can't believe it. This would be a wonderful resource and my husband, who just them morning was actually talking about raising our own chickens for egg production, would probably be receptive to learning about other ways we can provide for ourselves rather than relying on the grocery store aisles. Head over to Amy's place at Homestead Revival and check it out for yourself.


• An overview of how she began her journey and her homestead's situation in terms of climate and soil

• Watering solutions - sources, harvesting, and containment

• Gardening - how she raises enough to feed her family, and I mean all of it!

• Rabbits as a sustainable protein source

• Home butchering (rabbits are done in detail and then a couple of other small animals are addressed as well)

• Poultry as another sustainable protein source (more for eggs than meat, but she does discuss meat)

• Dogs as a working animal on your homestead

• Perennials: Orchards, Food Forests, and Edible Landscaping (Permaculture)

• Other Essentials: everything from solar food dehydration to hog panels!


It really was helpful having Marjory share what didn'twork for her, and I was encouraged by the fact that she didn't do this overnight. She's very clear that every homesteader should start small and learn from each step before jumping into something bigger. Honestly, I've wondered at times if being a sustainable homesteader was really possible in this day and age, but seeing what she's done on a small acreage with just a couple of hours each day to maintain what she's established has given me a renewed vision that it CAN happen.


During the video, Marjory will often reference a document that she's included on a separate CD for you to access. This is like getting a book of all the important, need-to-know information along with the DVD - primary sources! Some are from her state of Texas, but don't be mislead to think they won't help you. I spent some time going over the Texas Rainwater Harvesting document and it's an excellent 88 page resource for anyone, anywhere. It includes color pictures of examples along with detailed instructions for setting up your own system. All you'd need to do is find out your own state laws in order to be compliant locally.


Thursday, June 16, 2011

10 Things I Will Do via Notes from a Master Gardener

  1. Practice eating what’s in season locally. This will get your family used to eating seasonal produce, and, therefore, what you can grow in your own garden.
  2.  Keep a bucket filled with sand and a bit of motor oil mixed in to clean off dirty gardening tools.
  3. Solarize your garden area to get rid of weeds a few weeks before planting season. Clear out weeds or scalp mow your garden beds. Moisten the ground well, and cover with a large sheet of clear plastic. Weight the plastic down around the edges with rocks or bricks. Weed seeds will germinate, but the heat will kill them. Leave the plastic sheet on for 6-8 weeks. This will reduce the rate of weed seed germination by 60-80%.
  4. A wire mesh trash can is good for sifting compost.
  5. Mail order companies are best when it comes to buying seeds because they store their seeds in optimal conditions.
  6. Never work the soil when it is wet or very dry and have your soil tested so you will know what additives it needs.
  7. Transplant when it’s either a cloudy day or at dusk.
  8. Plan your garden so you’re planting for a staggered harvest. Otherwise, you may be harvesting tons of zucchini, for example, during a single week and then have to wait several more weeks for another zucchini harvest.
  9. Don’t water at night, and be sure to water the soil, not the leaves..
  10.  Use soapy water to get rid of many types of pests. (Don’t use a soap that contains citrus oils/ingredients.) Planting marigolds in the vegetable garden is another way to deter pests.

Friday, June 10, 2011

Composting, A New Spin


We have been composting for about a year, essentially what we have done is throw scraps into the dormant garden spot during the off season and during the season we toss them in a large spare pot and let it bake in the sun.  We periodically bury the contents in the garden.  My collection point is a old Quik Trip cup sitting on the counter--not terribly attractive.


Today I was preparing squash, asparagus and cantaloupe for dinner.  I ended up with a bunch of waste to compost.  I had the little food processor out because I had shredded some carrots for a salad and I thought to myself, if I shredded up all this waste, mixed it with some soil that would give it a start on the composting process.  I also thought since I am covering the weedy part of the garden plot with cardboard, wetting it down each day then letting it bake in the sun that I could toss the soil mixture on top of the cardboard which would help weigh it down, cover the cardboard and speed the process.


So sitting on my counter is a blue covered bowl with dirt and shredded cantaloupe rind, asparagus woody ends, a bit of squash, some egg shells, some coffee grounds and some orange peels waiting for my morning trip to the garden where I will pile it on one corner of the cardboard.  I will keep you posted on how this little experiement turns out.  Since I use the processor several times a week and have a large bag of soil leftover in the garage, I should be able to cover most of the weedy area by mid July.


I am hoping that I will be able to say that this little experiment panned out to be a success.  Wish me luck!

Wednesday, June 8, 2011

10 Things I Learned From My Garden This Year

I started a garden late last year after hearing my oldest son talk about his garden and how much fun he was having, how much better his produce tasted and how much cheaper it was especially when the money ran out before the week did.

I picked up a pepper plant, a tomato plant and a squash plant and put them in the old sandbox that DH had been using for our grass clippings and fall leaves.  Lo and behold, the plants grew and thrived despite me ignoring them except for the times I threw out kitchen fruit and veggie waste and when I watered.  We actually grew squash and one red pepper and a lot of tomatoes but some bug always ate them the day before I planned on picking them.  As a result of tossing fruit and veggie waste, we were surprised with cantaloupe from which we got a couple of good melons from.  Not much to brag about, but still we grew some stuff and was able to eat some of it.

This year I purchased some seed packets and planted seeds, watched them germinate, transferred them to pots and then waited for DH to till up the garden area.  He was so excited he built another box and filled it with fill dirt.  We finally planted the seedlings after all the rain ceased and now we wait for our bounty.

Without further adieu, the ten things I learned from my garden this year are
  1. When you see the seed potatoes at Nuts and Bolts, buy the seed potatoes because when you want them, they will be gone.
  2. Plant more squash as DS LOVES squash.
  3. When DH rebuilds the sand box plot, remind him that I want the box built narrower.  I am doing the square foot method and the center of the box is too hard to reach and (I don't want to get too dirty.)   Not really, but it is pretty inconvenient.
  4. Make a compost bin, stop using the large green pot.
  5. Use the large green pot for the seed potatoes (see #1).
  6. Read the seed packet and sow the seeds accordingly.  Some seeds grow quickly and others do not.  Work on timing.  Timing is everthing.
  7. Browse through seed catalogs to see what all is available because I want to incorporate more veggies into our daily meals.
  8. Build a couple of trellises from old stakes or small branches so that I can do some vertical planting.
  9. Buy a strawberry bush.
  10. At the end of the season, put cardboard down on the new garden plot and wet it.  Then shred some newspaper and put it on top of the cardboard.  Wet this too.  Add clippings from garden waste, contents of compost bin and leaves.  Then cover all with a tarp to encourage disintegration throughout the fall.  The fill dirt DH purchased is AWFUL.  This process should help greatly.

Friday, May 13, 2011

What You Really Do and Don’t Need for Gardening


1) You DON’T need commercial fertilizer, you DO need compost.

  • Compost has all the nutrients you plants need, plus it is free! I collect all my kitchen scraps (most anything but meat or dairy) in an empty coffee container on my countertop. But any container will do the job.  I am gonna get me a similar container because right now the cup I am using isn't cutting it in the appearance venue.


  • When it gets full,  take it outside to my compost container. A.K.A a trash can with holes drilled in the sides and bottom. I also add a shredded newspaper about once a week. I put the lid on and roll it around the yard a few times a week and there you have my $12 compost container that works way better than anything else I have ever tried. Instructional video here.  Gotta get me a trash can and do this.


2) You DON”T need landscape fabric, you DO need mulch
  • Black landscape fabric is designed to go under the mulch to prevent weeds. While it is effective, it is also aggravating and expensive. A green and free alternative is newspaper and or cardboard.
  • Spread several layers (about 10) of damp newspaper, or cardboard over the surface of your garden. This is a great chance to reuse/recycle your waste. If you are anxious to get started and don’t have that much newspaper or cardboard on hand you can ask some friends for theirs, or contact the local newspaper as they often have end rolls of paper without print that they discard with LOTS of paper left. FYI cardboard from cereal and cracker boxes work great too.
  • Make sure you overlap every piece because grass is RELENTLESS! Then cover it all with mulch. I use pine straw since I can rake it up for free but crushed leaves, bark, or cedar mulch is all great too. When you are ready to plant just tear a hole in the paper/cardboard, and plant. As a bonus the cardboard or newspaper will eventually breakdown making great food for earthworms!  
Gotta shred some newspaper and break down some boxes for this.  

3) You DON’T need Sprinkler Irrigation, you DO need drip irrigation.
  • Drip irrigation is MUCH cheaper to install and uses way less water than a sprinkler irrigation system. It is also very easy to do yourself…no really it is. Step by step instructions here. Most garden centers sell everything you need. All my hose outlets look like this:


  • If a drip irrigation is for some reason not possible, make life easier for yourself and plant your garden on a regular route you walk everyday. The walk to the car, the walk to the mailbox etc. Above all, CLOSE TO THE HOSE!
This is a great suggestion, but down the road for me.  I think I am going to poke some holes in some milk jugs and take them out to the garden for a temporary irrigation system.

4) You DON’T need a green house, you DO need an egg carton and a plastic bag


  • Egg cartons are the perfect size for seeds. The plastic bag (an old bread bag is perfect) keeps the soil moist. Once seeds have germinated remove the bag, when they plants are strong enough you can transfer to the garden.
I tried the egg carton thing this year, but they didn't really work well for me.  Will try again later in the season, but transplant them sooner.


Tuesday, May 10, 2011

Get Your Grow On


The Jiffy Greenhouse is super easy to use. Each of these little pellets is a pod of special soil for planting seeds. My greenhouse contained 72 pods, but they have smaller greenhouses with fewer. When you open it up, here's what they look like:


The instructions say to gradually add 1/8 cup of water to each pellet or, for my 72 pellet greenhouse, about 10 1/2 cups total.

I used my scratched-up measuring cup to ensure accuracy. Professionals are all about accuracy.


Adding the water is really fun, because the pellets grow! Here's what they looked like after I added about 4 cups of water:


And here they are after 8 cups of water. Don't give up on them! They will get bigger. It's not instant, but it's pretty fast. I'm sure your kids would like this project...I kept calling David inside from mowing the grass to check it out.


After 10ish cups of water (there's that Professional accuracy) they will be full grown planting pods. All you have to do now is to slightly loosen the mesh at the top of the pod and plant your seeds.

Seeds are not included with the greenhouse. The seeds that you buy will have helpful instructions on the back. Plant your seeds in the pods according to the directions on your seed packet.


These are squash seeds. My seed packet instructions said that they should be planted 2 per hole and 1/4 inch deep. And that is what I did.


Because I was planting several different types of seeds in my greenhouse, I used painters tape to identify what is planted in each row. I put the name of the plant and the date the seeds were planted. The dates will be helpful as I move baby plants to the garden and plant more seeds in the greenhouse. I'll be able to keep up with what's new in the greenhouse and how long it's been there by looking at the date it was planted.


Here's the whole greenhouse planted and put together. We planted Zinnias, Mint, Cilantro, Basil, Parsley, Cucumbers, Green Peppers, Squash, and Zucchini.

Greenhouse, professional variety.


Tuesday, April 26, 2011

Planted in My Garden

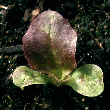
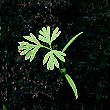
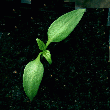
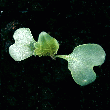
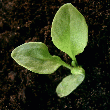
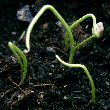
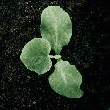
So, I spent some time identifying my seedlings, see my Did I Mention post.  I found out that:

  1. This one is Lettuce 
  2. This one is Parsley 
  3. This one is a Carrot   
  4. This one is Spinach 
  5. This one is Red Pepper 
  6. This one is Brocoli  
  7. This one is Kale  
  8. This one is Swiss Chard 
  9. This one is Onion 
  10. and this one is Squash
I will not make this mistake again next year that is for sure.  I will, I am sure, make a different mistake though.

Friday, April 22, 2011

Did I Mention

Did I mention that when I planted my seeds for the garden this year that I marked them very poorly and only know for sure what two of them are?


Well, look what I found while googling the net. . .http://theseedsite.co.uk/seedlings.html.  This site has images of seedlings identifying what they are!  I gotta go get my marking sticks and get to work.  Gotta love search engines.