Wednesday, January 26, 2011

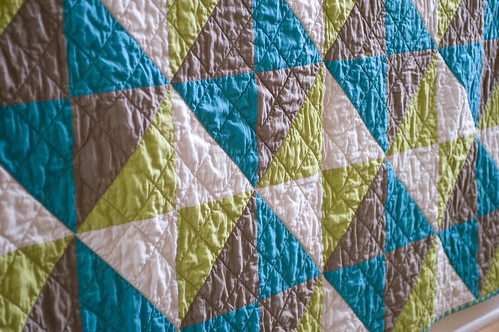
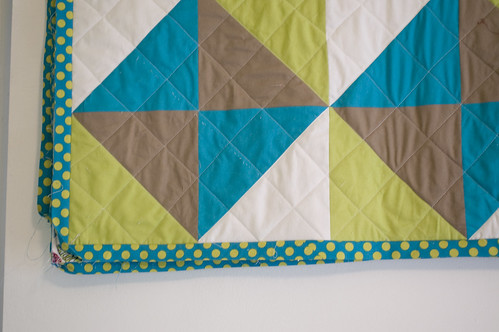
Triangles in a Square Quilt

Triangles in a Square Quilt: "


I'm taking a few vacation days from work here and there to work on projects and school work. It's been nice to get out of the office for a while, and it's even nicer to finish up some loose ends around here.


On Friday I quilted and sewed the binding on my triangle quilt. I don't normally do straight line quilting because accuracy is not my forte. Even though the lines are crooked and not all that parallel, I really love how the diamonds on this are all puffy.


This quilt is going in our living room on the couch. Since everything in our house is either green, blue or brown...this quilt is perfect for our house!


Here are the details:

Original pre-cut block size:

8" x 8"

Four yards of fabric in four different colors are needed (1 yard each color). You will be able to cut 20 blocks from each color.

Then, the 8" blocks are cut in half on the diagonal (40 triangles of each color).

Sew the triangles together to opposing colors. You will have 80 blocks total. Arrange the blocks in 8 columns and ten rows and sew together.

Binding (for 2.5" strips): 1/2 yard

Backing: 4 yards

The quilt is 54" x 68"


"

Hugs & Kisses

Hugs & Kisses: "
Hey there. I have another VSN mini project to share. This challenge was to use entwined images, so my first thought was to grab these cuddly koalas from Melanie's Cuddles and Hugs stamp set.


I stamped the koalas with Memento Tuxedo Black in and colored with Copic markers, starting with N7 where I wanted the deepest shading.


Added N5.


Added N3.


Then I filled in with N1.


I used my blender pen to push in some highlights.


Used N3 and N5 to make some lines for fur. I kept adding lines, then blending them in, and adding more to give it depth. After coloring, I cut out the image.


For the background, I cut an oval from Pure Luxury Sweet Corn card stock, using my Oval Nestabilities. I used a 1 1/4 inch circle, adhered with re-positionable tape, to mask for the sun. Then I sponged Memento Tangelo.


Removed the mask and stamped the leafy branch, from Hope Grows, using Memento Bamboo Leaves.


I layered with Pure Luxury Tan Leather and used a Sweet Corn card base. The sentiment is from Hope Grows.


Thanks for stopping by. I hope you have a great day!


"

An Ink Catalog

OKAY, SERIOUSLY why didn't I think of this?  I don't like the copic sheet that I have for anything other than when I am going to purchase something and I haven't figured out how to keep track of the SU inks I have.  This will work.  Follow the link to Spotted Canary for this and other great ideas.


An ink catalog is simply a visual display of ink colors one owns, placed in an easy-to-manage-and-use format. And it’s a snap to make!

Let’s go through the steps to creating your own:

  1. Purchase your “housing.” the structure that will hold your ink information. I bought a small, 3-ring binder. I liked this option best because I can use white cardstock for the pages, giving me a true representation of ink color with the paper I usually use for projects. The binder option also lets me manage my pages easily and you can add more if needed.
  2. Create your pages. Create labels to name the color of each page or section.
  3. Fill in your pages. Select a color family and gather the appropriate inks. Using a small, solid image, ink and stamp each color onto the page. I inked once and stamped twice, recording what each color’s 1st and 2nd generation shade is.
    Ink Catalog - Image 1

Tuesday, January 25, 2011

Clutter Control for Any Space

Clutter Control for Any Space: "

Post written by Zen Family Habits contributor Mandi from Organizing Your Way.

I could probably write a post every day of the year on how to control clutter in this area or that space, and we still wouldn’t be able to cover every scenario or trouble spot. Instead of trying to cover them all, I want to share with you four secrets for battling clutter in any space:


Declutter


The first step to conquering clutter in any room of your house is to declutter the space. Having too much stuff inevitably leads to clutter, and it will undercut your best efforts at clearing surfaces and getting organized. This is a hard step to take, but it’s important to take an honest look at the stuff around you and begin to get rid of clutter.


You’ve probably heard this method before, but the easiest way to get started is to take three bags, bins or boxes and label them Keep, Give Away and Trash. Sorting through the clutter will involve some tough decisions, but keep your final goal in mind, knowing that the less stuff you have, the easier it will be to keep surfaces and spaces clutter free.


Here are some additional resources to help you make those decisions:


Identify


Once you have decluttered the space, begin to identify the clutter. Are there stacks of paper waiting for you to take action on them? Are there toys and games that don’t have a home in a certain room even though that’s where they often get played with? Piles of laundry waiting to be taken to the laundry room?


Identifying the types of clutter that you battle on a regular basis is an important step to being able to control it. Once you identify what it is, where it comes from and where it eventually ends up, you’re in a much better place to control it.


Containerize


Ask any organized person, and chances are they’ll tell you how much they love two things: containers and labels. Using containers to group like items is a simple and effective way to control clutter because it keeps things from getting spread out all over the place.


Aby from Simplify 101 recently shared another tip with me related to containers as well. She recommends that her clients use open top containers wherever possible because you’re much more likely to actually use them if you can just toss things in rather than having to pull containers out, open them, put things away and then put the box away. Of course, for things you use less often, a closed container works as well.


Next, be sure to label your containers so that you can find the things you’ve organized. While I love my handy Brother labeler, there are a ton of labeling options depending on your needs, including:


Touch It Once


Finally, once you’ve gotten the clutter cleaned up, it’s important to have a plan in place to keep the area clutter free. One way to do this is with the touch-it-once rule. Most clutter forms when we set something down because we don’t know what to do with it or don’t feel like dealing with it at that moment.


Instead of falling into this trap, commit to taking each item to its home right away. When you get the urge to set something down and deal with it later, think through what obstacles are in the way of putting it away right away.


  • Does it have a home, or do you need to create a home for it?

  • Is it something you need to access later, so you need a temporary spot for it?

  • Are you setting it down to remind yourself of something later?

  • Is it hard to put away?


Create temporary zones — such as an inbox for mail, bills and other important paperwork – for the items you need to hold onto as a reminder, and reorganize trouble spots so that it’s easy to get and put away the items you use most often.


Clutter contributes to stress, anxiety and feeling overwhelmed, and while the idea of tackling the clutter can be overwhelming as well, the benefits are well worth the effort!


Read more about productivity, organizing and home management from Mandi at Organizing Your Way, or follow her on Twitter.
"

3 Ways to Optimize Your Health and Well-being

3 Ways to Optimize Your Health and Well-being: "

Post written by Zen Family Habits contributor Melanie from Dietriffic.

Life can get pretty busy at times, and sometimes our health begins to suffer as a result.


But, as parents we are duty bound to look after our own health, just as much as we are to look after our children’s health. After all, if your health begins to suffer, who will be there for your children, giving them the care that only you can?


We all know that what we eat on a consistent basis has a huge impact on our health. But, often when life gets busy, it’s our healthy eating habits that get pushed to the bottom of that ever increasing to-do list.


So, what areas do you need to focus on for optimal health and well-being?


#1 Strong Bones

People seem to forget about bone health, once they get past their teens. However, you are still building bone mass into your 30s. This means, if you are pre-30′s, there’s still time to boost your bone strength.


A calcium-rich diet is recommended for both men and women. Good calcium sources include plain yogurt, milk, calcium-fortified soy milk, cheddar cheese. Some non-dairy sources include Chinese cabbage, kale, broccoli, and calcium-fortified orange juice.


Weight-bearing exercises are also necessary for increasing your bone density, and reducing the risk of osteoporosis later in life. Think, walking, jogging, and step aerobics, etc.


Vitamin D is essential, too, otherwise the calcium in your diet is basically irrelevant. Try to eat oily fish and eggs regularly. Other sources include fortified margarine, and breakfast cereals. Or course, short periods in the sunlight are also important for synthesizing vitamin D in the skin.


If you are over 30 years of age, don’t worry, you can make changes in your lifestyle that will help slow the process of bone loss — all of the above are also relevant for you too.


#2 Fight Fatigue

Fatigue hits us all at times, as we try to juggle work, relationships, and our children. But, sometimes, that fatigue stems from low iron stores, particularly prevalent among women in their 20s and 30s, who don’t eat much meat.


The best sources of iron come from animal protein, such as liver (not if you are pregnant), meats, or chicken, however you can also get iron from plant sources. To aid the absorption from these plant foods, eat them with a vitamin C source, such as orange juice, red peppers, or strawberries.


Non animal sources of iron include beans, nuts, dried apricots, brown rice, fortified breakfast cereals, and most dark green leafy vegetables (such as curly kale).


Be aware that tea and coffee contain polyphenols which can bind to iron, making it difficult for your body to absorb. So, avoid drinking tea and coffee during, and around, your mealtimes.


#3 Lose Weight

Being overweight obviously puts you at an increased risk of health problems. Unfortunately, there’s no magic trick that will help you to lose weight overnight. But, weight gain doesn’t have to be an inevitable fact of life, as we grow older.


It’s true, metabolism does slow downs and you start to lose muscle mass as you get older. But, taking some exercise, and reducing your calorie intake can go a long way to offsetting that.


If you are eating the same, or more, than what you did in your 20s, you probably need to cut back. Take a look at your dinner plate proportions — you should fill one half with non-starchy vegetables, one quarter with lean meats or alternatives, and one quarter with starchy carbs. This is an easy way to control your food portions.


Fiber is also important, as it will help you to feel fuller for longer, which means you take in fewer calories over the course of one day. Some of the best sources of fiber include peas, beans and lentils, fruit eaten with the skin on, berries, high fiber breakfast cereals, and nuts such as almonds.


When you eat well, you feel well. That ultimately means you’ll be able to cope with whatever life has to throw at you… even those tantrums from your two year old!


Read more healthy eating tips from Melanie on her blog Dietriffic, or follow her on Twitter.

"
The Blind Side Movie Deal

The Blind Side Movie Deal: "

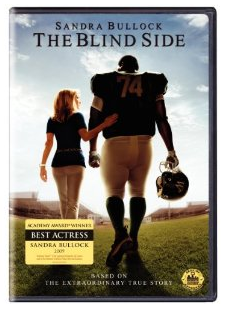
Did you know that you can purchase The Blind Side for only $5.49 at Amazon? (I have Amazon Prime so I don’t have to pay shipping, but if you don’t, it qualifies for Super Saver shipping if you order over $25.) This is a great family movie and a wonderful item to add to your gift closet.


I also keep an eye out for inexpensive movies to keep on hand for our summer vacation travel. I pick them up as I find them and hide them away in the van for viewing this summer.


The Blind Side

"

Friday, January 21, 2011

12/20 Word Play with a Heart

12/20 Word Play with a Heart: "

Is anyone else just a little busy? Where did all my fun stampin' time go?? I will have to delve into some things I haven't had a chance to post yet. Enjoy!

This is a card that I gave to my brand new Senior Associate at my last downline meeting. The sentiment is stamped with Versa Mark ink and embossed using the Heat Tool with White Embossing powder. I used the same technique on the heart on a scrap of Real Red which I then cut out and popped up onto the card with dimensionals. A simple ribbon tied around the card gives this card the perfect finishing touch.

The inside of the card is left blank with the exception of the lower left corner where I stamped the heart in Real Red ink. So sweet and pretty. This is a nice card that can work for many different occasions.

Have a happy stamping day!!

The Stampin'Up! supplies that I used to create this card are listed below:

Stamps: Word Play, I {Heart} Hearts
Paper: Real Red, Whisper White
Ink: Versa Mark, Real Red
Tools: Heat Tool
Accessories: 5/8' Whisper White Organza Ribbon, White Embossing Powder
Adhesives: SNAIL, Stampin' Dimensionals

My Promotions
Stamping to Share Events
Stampin'Up! Shopping at Stamping to Share
Join the Team Stamping to Share . . . password: 'stampingtoshare'

Kay Kalthoff is a Stampin' Up! Demonstrator in Lino Lakes, Minnesota stamping, caring and sharing with customers and demonstrators locally and nationally!
"

Punch Art Double Daisies

Punch Art Double Daisies: "

Now this is my kind of punch art - I absolutely love this card! I think it could be that it has dimensional flowers, swirls & texture which are three of my favorite things. Plus it's quick, easy & colorful.


Punch art double scallop daisies
The double daisies are made with our TWO scallop circle punches! Yes, that's right, we have a new larger scallop circle punch now too. It's 2 3/8" around!

After you punch them out just cut up into the scallops about 3/4" to form petals & then lift every other petal.

The colors are Daffodil Delight, Tangerine Tango & Real Red.


  • Stamps - Perfect Punches

  • Card stock - Daffodil Delight, Tangerine Tango, Real Red, Pear Pizzazz, Whisper White

  • Ink - Real Red, Tangerine Tango

  • Accessories - wide oval punch, 1 3/4" & 2 3/8" scallop circle punches, SU buttons, Daffodil narrow taffeta ribbon, sponge dauber, mini glue dots

  • Sizzix - Perfect Polka dot embossing folder, Swirly Decorative Strip die, Big Shot


See all of my Punch Art here!


"

Build a Blossom with the 3P's

Build a Blossom with the 3P's: "

Buildablossompoppy


I just love this color combination, it is Poppy Parade, Peach Parfait and Pear Pizzazz, I call this combo the 3P's. I also used it on my Founder's Circle Swap this year.


I had some extra pieces left over from that swap that were already embossed with the Elegant Bouquet Textured Impressions Embossing Folder so I grabbed one and started the card.


The petals and leaves are stamped with the Build a Blossom stamp set W121923 or C121994 and punched out with the Blossom Petals Punch 121808. I added some Poppy Parade Poly Twill Ribbon around the whole thing.


Close Notice the center piece, I stamped the flower middle in Pear Pizzazz and layered it on a button from the Sweet Buttons Embosslit 121813. I love this embosslit, it makes layering the smaller circles so much fun!!!


You can order your Build a Blossom set and the coordinating Blossoms Petals Punch in my Online Store right now!!!


Remember~~~


Place an order of at least $45 through Sunday and get a FREE Petal Cone Kit


Christmas Cards for Sale, I have a few packages left.


Are you a Stampin' Buddie??


Barbheartsiggy


"

Just Believe in Certainly Celery

Just Believe in Certainly Celery: "

justbelievemarypolcin


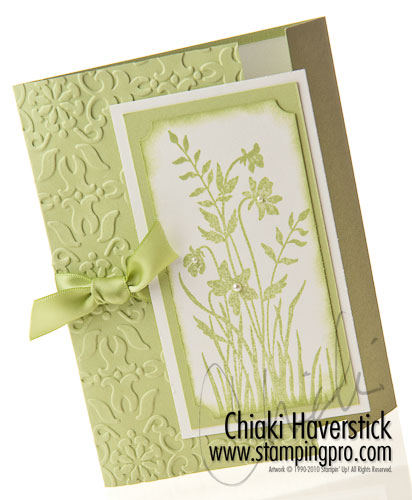
This simple yet very elegant card design is from Mary Polcin. I saw this card when I attended convention and had to recreate it changing up her color choice for my Stamp-a-Stack class this month.


Just Believe Stamp set; Certainly Celery inkpad, cardstock and satin ribbon; Sponge dauber; Ticket corner punch; Vintage Wallpaper TIEF; Basic Pearls jewels.


"

Technique Tuesday - tying ribbon knots

Technique Tuesday - tying ribbon knots: "Hi Everyone. Happy Tuesday and welcome to Technique Tuesday. This week I have a quick video for you. Many of you comment on my ribbon knots on my cards and have asked me to show you how I do them....


[[ This is a content summary only. Visit my website for full links, other content, and more! ]]


"

Winter Wonderland

Winter Wonderland: "


Hello Peeps !!!

Happy Sunday !!!

How is everyone's weekend?
I made a card using the Lovely as a Tree set- my all time favorite which is so versatile. I have used this so much for a manly card but this time I thought I could do a Winter Wonderland scene. The little snowman is from the Snow Buddies. I really decorated him up with Crystal Effects and silver pearls.
I added snow sparkles around the tree. Hope you like it.
RECIPE:
Stamps: Lovely as a Tree, Bright Christmas
Paper: Marina Mist, Old Olive, Whisper White, SU DSP
Ink: Marina Mist, Old Olive
Accessories: grosgrain ribbon, pealrs, sparkles
Tools: dotted scaloop ribbon border punch, Neatie, dimensionals, CE, glue

Thanks, for stopping by.
Have a wonderful day stampin'
Chat
"

Be My Valentine Square Card

Be My Valentine Square Card: "2011-01-12_ValentinesCards_007_564x600_.jpg

by: Lianne Carper

Description: Here's the first Valentine's Day card I've made this year. I also created a free project sheet on it which you can download. http://www.cardscraps.com/blog/?p=2336

A Little Tropical Party – part 1

A Little Tropical Party – part 1: "

Stepped up versions by Lianne Carper of cards created to be taught at the nursing home using the Tropical Party stamp set by Stampin' Up! Over the next three days, I’m going to be showing you three different cards created with the Tropical Party stamp set by Stampin’ Up! which debuted in the 2010 Summer Mini Catalog. It took me a little while to warm up to this set, but now I’m lovin’ it! And I haven’t even used my favorite stamps in it – the flowers!


The cards I’m going to be showing you are stepped up versions of cards that Brenda will be teaching at the nursing home next month. I’ll let you know what I’ve changed (or stepped up) from their version.


Stepped up versions by Lianne Carper of cards created to be taught at the nursing home using the Tropical Party stamp set by Stampin' Up!Today’s card reminds me of the jungle. It’s perfect for a masculine birthday but would work well for a feminine birthday as well.


How I stepped it up. For starters, I added some of the Log Cabin Smooch Spritz to the Kraft (soon to be called Crumb Cake) background matte. Just a few light squirts is all you need. Next is the addition of twine. Rather than twine, their card has the happy birthday sentiment lower centered in the Old Olive Island Oasis designer paper strip but still overlapping the stamped palm tree image. Last but not least, I have popped up the stamped image on Dimensionals whereas theirs is flat and glued directly to the card front.


I hope you like today’s card. If you’d like to make your own, I have uploaded instructions for you to download from our ResourcesProject Sheets section.


Stepped up versions by Lianne Carper of cards created to be taught at the nursing home using the Tropical Party stamp set by Stampin' Up!


Happy Stamping :)


Lianne Carper
CS partner and DTM for Brenda Cook
Independent Stampin’ Up! Demonstrator


Supplies - all supplies Stampin' Up! unless otherwise noted


  • Stamps: Tropical Party, Teeny Tiny Wishes


  • Paper: Old Olive, Soft Suede, Kraft and Whisper White card stock and Island Oasis designer paper


  • Ink: Soft Suede and Old Olive Classic Inks, Chocolate Chip and Old Olive Stampin’ Write Markers


  • Other: Square Lattice Textured Impressions Embossing Folder, Log Cabin Smooch Spritz, Hemp Twine, Sponges, Stampin’ Dimensionals, Glue Stick, Word Window Punch and Modern Label Punch


"

Be My Valentine–Again!

Be My Valentine–Again!: "

Card made using the Be My Valentine stamp set and Love Impressions designer paper by Stampin' Up!I have a feeling that I am going to be reaching for the new Be My Valentine stamp set quite often within the next few weeks, so you’ll just have to bare with me on that one.LOL. I just love the little banner and it’s perfect to go with any heart. Now we just need a plain banner that we can add our own sentiments too.and a punch to go with it! Do you hear me Stampin’ Up! designers? LOL. Oh well, for now I will just have to bombard you with cards using this one! Hope you don’t mind.

This card was inspired by one created by Terry Blais. I changed it up a little but the basic principles are the same.

I created a project sheet for this card called the Glittered Heart Be My Valentine Card which you can download from the ResourcesProject Sheets section.

I hope everyone has a wonderful weekend! I’m so glad to be back to stamping and creating! I’ll have more to show you next week – I promise!

Happy Stamping :)

Lianne Carper
CS partner and DTM for Brenda Cook
Independent Stampin’ Up! Demonstrator

Card made using the Be My Valentine stamp set and Love Impressions designer paper by Stampin' Up!

Supplies - all supplies Stampin' Up! unless otherwise noted


"

Make Your Own Condensed Cream Soup

just what i need for my chicken noodle soup recipe that ds loves so much


Make Your Own Condensed Cream Soup: "


Since my son can’t eat dairy and most casseroles call for condensed Cream of Chicken, Cream of Mushroom or Cream of Celery soup, I went for some time avoiding casseroles. But then I realized that I could make my own “frugal” condensed soup using his dry, soy milk mix.

Even if you’re not trying to avoid dairy, making your own condensed soup is a great way to save money. You can just use regular dry milk powder where I use soy. A “can” of soup made from this recipe costs only a few cents.

Condensed Cream Soup

2 Tbsp margarine or butter

2 Tbsp flour

1/3 cup dry milk powder

2/3 cup vegetable broth (saved from your last turkey or chicken dinner)

Melt butter and slowly blend in flour. Add milk powder and broth. Sprinkle with salt and pepper to taste and stir until smooth. For celery or mushroom soup, saute two tablespoons of finely chopped celery or mushrooms before adding the flour.
"

Reduced Fat Peanut Butter Spread Recipes

this is just what i needed, for a couple of reasons.  first off, i too, love peanut butter and like to have it as a snack quite often; however it is higher in calories than i like so i will give these suggestions a try and secondly because i just found out about the send to feature in my google reader and this post was the first one i tried it on.  it is exactly what i wanted this blog for.

as a sidenote, yes i know that this has no caps in it, our keyboard is apparently failing and the shift key doesn't work so it is either no caps or all caps.  i am normally a have to have everything that is supposed to be capitalized capitalized so this is reeellly outside the box for me.  what's next, punctuation?


Reduced Fat Peanut Butter Spread Recipes: "

We love peanut butter around here. But when I’m losing weight, grabbing a thick gooey peanut butter sandwich just isn’t an option. One 2 T serving of peanut butter has 190 calories; 17 grams of fat, and 8 grams of protein and that doesn’ t count the bread or the jelly. With these peanut butter spread recipes, I can still get a hint of peanut butter but with nearly half the calories and fat. There are lots of options for blending peanut butter. Choose the one that most appeals to your tastes.

Peanut Butter/Cream cheese Spread


1/4 cup Fat free cream cheese

1/4 cup creamy peanut butter (all natural is fine)

1 packet stevia sweetener like Purevia® or Truvia®.

Blend all in a food processor or electric mixer with a whip. Chill.

2 Tablespoons has 111 calories; 8 grams of fat; 4 grams of carbs; and 6 grams of protein

Peanut Butter/Tofu Spread


Use the recipe above except substitute 1/4 cup or 2 oz of soft silken tofu for the cream cheese.

2 Tablespoons has 105 calories, 8.8 grams of fat; 3 grams of carbohydate, and 5 grams of protein

Peanut Butter Cottage Cheese Spread


Use the recipe above, but replace the cream cheese with 1/4 cup skim milk cottage cheese, pureed smooth. This one really needs a food processor.

2 Tablespoons equals 106 calories; 8.3 grams of fat; 4 grams of carbohydrate; and 6 grams of protein.
"