Wednesday, April 20, 2011

Tutorial: Creating A Facebook Page

Tutorial: Creating A Facebook Page: "
Learn how to make a Facebook page in just 4 easy steps! Anyone can do it!

Facebook Page

1. Sign in to your Facebook account.

2. On the left side of your NewsFeed, you’ll see “Ads & Pages”. Click on that.

3. Then, look again on the left side and click “Pages”.

4. Then in the upper right corner, click on “Create Page”. It then will show you where you can go in and edit the details of your page and add content and a profile picture.

See how easy that was? You have now just created your Facebook Page! Congrats!


"

Mod Podge Mayhem

Mod Podge Mayhem: "Come one come all! :) It's time for the Creative Chick Parade and I'm super excited to announce our first project for the week, Mod Podge Mayhem!


I'm so excited for this one! I love me some Mod Podge! Want to see my most favorite Mod Podge creation? My Family Rules canvas! Yes, of course I could have simply glued the sheets of paper on, but it needed that extra touch of something--- Hello, lover!

My gallery wall after six months in the making!

Now this is thinking outside of the box. Gorgeous!

My gallery wall after six months in the making!: "A few months back, I posted about my garage sale chairs. My hubby decided that they had sat in my garage for far too long, and told me to get rid of them. So, naturally, I rebelled and quickly came up with something to do with them. :)

To see the entire transformation, check out the original post found HERE.

To make a long story short, I decided to create cheap picture frames out of them. Fun huh!?!

I had been searching for frames to make a gallery wall of all four of my kiddos. But since the baby was born, I haven't ventured out to the thrift stores as often as usual. And before he was born, I couldn't find the motivation to work on the project until he could be part of it.


It is the first thing that you see when you enter my home. The smallest of the photo prints are 12X18 inches. So, they are BIG. The bigger the better, right? Go big or go home, I always say.


I


The best part? Total cost of frames and prints? Less than $40.00. :) Now that's THRIFTY!


I'm linking this post to the Gallery Wall Linky Party over at The Inspired Room.
"

Teach Me Tuesday: Creating Faux Paintings from Posters

Teach Me Tuesday: Creating Faux Paintings from Posters: "


 Jess at Frugal with a Flourish. figured out an easy way to turn an art print poster into a faux painting. Genius!

Jess explains:

I think one of the most difficult things for me with decorating is that I love paintings. But they can be so expensive – especially if you want to get larger ones. And as I was drooling over some of the larger ones the other day at Home Goods – one of the cheapest places I know to get paintings – I saw a painting I loved for $50. It had a similar look and color scheme to a poster I saw at Hobby Lobby for much less. On sale, that poster was only $4.98 (50% off!). But a poster just isn’t the same as a painting.

The thing is – what makes a painting a painting is the texture. The brushstrokes against the canvas. That is why posters are a sad substitute for paintings. You lose the texture against that clean smooth matte finish of a poster. For as beautiful as they are – they lack the depth that a painting has, they lack the grain of the paint.

And as I pondered this – I had a flash of brilliance. What if I could replicate that depth and texture? So I decided to give it a go – and for a $5 poster – what did I have to lose? So here is what we started with – my $5 poster and a cardboard back from the frame I got at Goodwill this weekend. (Oh and until I decide what I am going to do with my old coffee table, it makes an excellent work table don’t you think!)


Next, we need to create texture and adhere paper to cardboard, so grab the Mod Podge and put a nice layer on the cardboard and smooth the poster ever so carefully on. Make sure you get it laid down smooth or it will bubble (but we will get to that).


Next – using the poster as your guide – brush on the Mod Podge in the direction of the strokes in your poster. I found that it is helpful to use a brush that is similar in size to the one that was used to create the original work and that has rougher bristles so you get a better texture. Don’t worry – if this is your first time working with Mod Podge, it will dry clear. Oh and if you do get any of those bubbles – just smoosh them down (don’t worry if it bunches) and add another layer of Mod Podge – it will just look like layered paint!


I did two coats to really give it some depth and oooh do I love the results! Check out these close ups of it dry.


And here…


I love the way it turned out! Check out another shot. It really looks like a painting now!!


I then cut down one of the mats from my Goodwill painting to show off as much of the painting as possible but cover that white poster edge! If you ever need to do that you just need a cutting board and a sharp cutting object. I used my rotary cutter and a carpenter’s square.


I would just use a pencil to outline your cuts and go from there.


So here is my finished project – for $10 I got this beautiful 16×20 work of “art”! I put it in my Goodwill frame. (After I gave it a nice coat of satin black spray paint of course!)


Ten Easy Blogging Tips for Beginner Bloggers; Or, What I Wished I Had Known in 2006

I so need to do this.

Ten Easy Blogging Tips for Beginner Bloggers; Or, What I Wished I Had Known in 2006:


Ten Tips for Beginning Bloggers


1. Buy your domain.


I was shocked at Blissdom '09 to find out that it only costs $10 a year to own your domain. Ten dollars! (Now it appears to be $12 if you want a .com and less if you could deal with a .us, .me, or .org.) It's super easy to redirect your site to a domain. I am always flabbergasted at the amount of sites that still have '.blogspot' in their URL. 'Vanderbiltwife.blogspot.com' just doesn't have the same ring as VanderbiltWife.com.


If your domain is already taken, you might consider renaming your blog, inserting a number instead of a word, or something similar. Be creative!


2. And while we're talking titles, choose something with zing. Be original. What makes you uniquely you? What exactly is your blog about?


3. Make yourself accessible.


Please, please make it easy to e-mail you from your blog's homepage. See that little 'e-mail me' button on the sidebar? I wish everyone had one. Because sometimes I just have a burning question about you or a post that is too long to post in a comment, or maybe too personal.


Using Twitter and starting a Facebook fan page are great, too, if you're going to use them.


4. Set up a profile on Blogger (whether you use Blogger or not) so it's easy to comment on Blogger blogs. MAKE YOUR EMAIL VISIBLE. (If you use gmail or other Google apps, you already have an account ready, I think.) Lots of blogs are Blogger-based (like this one), and it's a pain for a blog author to compose a whole e-mail reply to someone who commented just to realize that their e-mail is not there.


I would respond to nearly all my comments if their e-mails were available! (I try to respond to many as long as that e-mail is visible. PLEASE MAKE IT VISIBLE.) Blogging is about conversation and we authors want to respond!


5. Blog hop. See what other people are doing. Leave comments. See if others want to guest post on your blog, or do a series together, or just chat on e-mail. Follow lots of people on Twitter, if you use it. Share links. Be generous. Be genuine.


6. For the love of Pete, unless you are Ann Voskamp (and that's still iffy), do not have music auto-playing on your blog


7. Install Google Analytics. At some point, you might want to see how people are getting to your blog, what they search for to find you, or how many pageviews you are getting. Go ahead and do it now! I wish I had!


8. Apply some simple SEO (Search Engine Optimization.) This is MUCH EASIER to do on the front end than after you have 900 posts. (Not that I would know. Cough, cough.) Tara has two excellent slideshows with easy tips.


9. Link to carnivals. You know Menu Plan Monday, Top Ten Tuesday, Wordless Wednesday? Those are carnivals. Linking will bring you a little traffic and checking out others' links will expose you to blogs you might never have found otherwise.


10. Don't underestimate your worth. You probably don't have The Pioneer Woman's traffic, a book deal like MoneySavingMom, and the striking good looks of Jill. That doesn't mean you should settle for a toothbrush as payment for a review, or bend over backwards for a company that does nothing in return. Determine your worth and stick with it. Only do what you really want to do. And don't force yourself to write when you don't want to ... the content will never be as good.


"

Secret codes~

Blogging on Blogger tips! Thanks to Kristen who very nicely explains it on her blog.

Secret codes~: "


You can change almost any aspect of your blogs appearance without screwing around with your HTML!


Here is how you do it.


Sign in to Blogger.


From the Blogger Dashboard click on Design


Click template designer


Click on Advanced


scroll down till you see Add CSS


Now start adding your secret codes!


As you add your codes you can watch the changes happen to your blog right below.
Don't worry, It's not saved until you click apply to blog.


Here are a few codes I used because somehow they disappeared on my blog last week.


Took the navigation bar on top of my blog off


#navbar-iframe {height:0px;visibility:hidden;display:none}


I didn't like the way the tabs under my header were crammed against my post. I added this secret code to give it a little more space. (your numbers will most likely be different from mine)


.content-inner {
padding:10px;
}
.main-outer {
margin-top: 30px;
}


Feel like changing the space between your gadgets? Mess around with that zero till you like your spacing.


.sidebar .widget {padding-bottom:0px;}


Are you getting it?


There are a ton of secret codes out there for you to play with. You can find them


The best part, no messing up your whole template because you have done something wrong to your HTML!


Have Fun!
Enjoy your weekend!
XOXO

Kristin
"

Little Lucy Lu: Ladder Laundry Rack

You gotta go see this clever idea.  This would work right in with my homesteading desires.  I wonder if we could find something that would work in our small place?

Little Lucy Lu: Ladder Laundry Rack

Do You Have a Public Alert Radio?

I need to get both of these for our family.

Do You Have a Public Alert Radio?: "


This is a Public Alert Radio with weather and emergency alerts! And it cost under $40. Whenever there is a severe storm or hazard in our immediate area, an alarm will sound. Then it is followed by a message from the National Weather Service. Pretty Handsome Guy programmed our weather radio to only go off for severe watches and warnings and only for our county. This really helps eliminate any false alarms for other counties.


After the experience I want to urge you to purchase a good Weather Alert Radio. Don’t buy one that can’t be programmed to eliminate other counties and certain warnings that might not pertain to you (i.e. flash floods.) We have several friends who turned their alert radios off because “it is too annoying when it goes off all the time.”


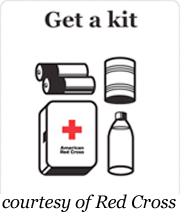
Another way to be prepared in case of severe weather or an emergency is to have a Disaster Preparedness Kit. Most of the information from the class can be found on the Red Cross Website, HERE.

101 Ideas in 1001 days

I saw this idea on a blog I visited in the middle of the night last night (couldn’t sleep). The general idea is to list 101 things you want to do in the next 1001 days. This will obviously have the be a work in progress; both the ideas and the accomplishments. Should be fun though and it is good for me to have a purpose. So, in no particular order or significance. . .

This list was originally written on May 25, 2008.

  1. Attend Eucharistic Adoration at least one time each month.
  2. Attend Mass on a day other than Sunday
  3. Assemble our emergency backpacks. Buy some on sale. DONE
  4. Get rid of as much junk in that basement as I can get away with.
  5. Redo the big closet in the office. DONE
  6. Keep van vaccummed VAN SOLD
  7. Practice tennis with Rob one time per week this summer. DONE
  8. Play basketball with Rob one time per week this summer. DONE
  9. Read to Rob daily. DONE, THEN NOT DONE
  10. Actually finish a quilt block completely.
  11. Purchase more white accessories. DONE
  12. Get rid of old clothes DONE
  13. Complete a cleaning list for each room in the house.
  14. Increase my steps walked to 10,000 average per day. JOINED GYM INSTEAD – RIDING RECUMBANT BIKE DUE TO JOINT PAIN ISSUES
  15. Spend more time daily in my spiritual development. Continuing to work on, teaching School of Religion, leading a book study and attending SHE helps in this area. DONE BUT THEN GOT DIAGNOSED AND HAVE HAD TO STOP ALMOST ALL OUTSIDE ACTIVITIES. HAVE BEGUN A BIBLE STUDY WITH A NEIGHBOR FRIEND THOUGH
  16. Become systematic in my stretching, chair exercises, feet and leg therapy, back and hip therapy and weight training. IN PROGRESS
  17. Think less; do more. NEED TO WORK ON
  18. Continue to DVR what I want to watch and watch it on my schedule not their schedule. DONE
  19. Find and purchase Harmony House Symphony dinnerware in chartruese.
  20. Use the library DONE
  21. Take Rob to the pool twice a week during the summer. DONE
  22. Use Craigslist to get rid of things we no longer need/want.
  23. Make at least 100 cards using my stamps and scrapbook paper.
  24. Make at least 40 scrapbook pages
  25. Get Cassidy the book about the teacher and the bunny rabbit. DONE
  26. Build at least one bookshelf with Rob. DONE
  27. Pray more for my children and their spouses and children. Doing it
  28. Weigh 150 pounds (which would mean I would be maintaining that weight for some period of time) THANKS TO MY DIAGNOSIS THAT IS NOT HAPPENING
  29. Grow our own herbs; I’m thinking sweet basil, oregano, parsley to start with. YOU SHOULD SEE THE BASIL
  30. Get a handle on my chocolate addiction; eliminating it if I can. DOING MUCH, MUCH BETTER
  31. Figure out how to get my WFMW entries to pop up like she wants them to – this is driving me nuts! DONE
  32. Start a vegetable garden DONE
  33. Plant bulbs Carol R. gave me. DONE let's hope they come up in the spring. (They didn’t))
  34. Go to Mass an additional day each week
  35. Go back out to the arboretum with my camera
  36. Bless the house daily with Rob
  37. Stop the madness with CVS (I have stopped the madness) DONE
  38. Stop the newspaper paper copy DONE
  39. Turn off HBO DONE
  40. Set up garage for Greg to rebuild motorcycle (Got that done on 6/28!)
  41. Water plants on Wednesdays DONE
  42. Menu plan on Mondays
  43. Laminate the recipes I am going to use as our regulars from now on
  44. Speak with Rob daily about the Regnum Christi resolution or some other such spiritual matter
  45. Dust something daily
  46. Read You on a Diet DONE
  47. Finish a crochet block.
  48. Buy a new refrigerator DONE
  49. Determine my role in Kathleen’s life and implement it DONE
  50. Cook more at home DONE
  51. Have Rob write a fish story DONE
  52. Figure out when 1001 Days is over DONE -Februay 21, 2011.
  53. Plan a vacation DONE
  54. Determine what vitamins and minerals to take DONE
  55. Take vitamin D 3 Doing it
  56. Start riding the recumbant 3 times a week
  57. Mistreat kitchen window (insert a blue and yellow panel on bottom third of curtain) (or change out the panels to a different color with those I got on clearance)
  58. Mistreat bedroom window (insert above blue third panel on bottom of tan one and add a trim piece)
  59. Hang curtains in my new studio
  60. Make a collage of me
  61. Make a prayer journal
  62. Listen to books on tape DONE
  63. Write a TOPS letter once a month. DONE
  64. Get TOPS folders in order DONE
  65. Find out about Ascensions Bible Timeline Study Doesn't fit my schedule. Check for 2010 GOT SICK
  66. Find Familia contact person and see if a season one is going on anywhere (Done) Check for 2010 GOT SICK
  67. Listen to music more and talk radio less Now listening to books on tape instead DONE
  68. Spend more time enjoying Rob's fish Enjoying it so much, I’m getting my own DONE
  69. Get playroom organized
  70. Price carpet for playroom, stairway and hallway We put wood laminate on stairway and hallway! Playroom still to be determined
  71. Plan another vacation Quick trip to St. Louis DONE
  72. Get a procedure in place for birthday cards
  73. Pray more
  74. Listen to books on tape to get more reading done. DONE
  75. Clean up blog
  76. Figure out how to signup for an online photo place
  77. Write more creatively
  78. Keep working on the learning how to draw book
  79. Keep up with my friends a bit better Doing it
  80. Keep loving my husband Doing it
  81. Keep being a good mom Doing it
  82. Ask for help in the room mom duties Seems to have worked itself out DONE
  83. Ask Carol to bring her grandson along to a movie or something else that Rob and I would do (Done)
  84. Follow Greg on a motorcycle trip DONE
  85. Get Rob a Wii Fit then use it Finally found one on Friday. It is fun.
  86. Drink more water
  87. Finish this list DONE
  88. Enjoy the process of everything (Doing it)
  89. Find a buffet for the dining room Found it Candel, just have to get the money to buy it
  90. Buy a BlendTec
  91. Start green smoothie plan
  92. Scan loose paper
  93. Figure out a coupon plan
  94. Get items on Craingslist or get rid of them
  95. Move remaining clutter from Greg’s exercise area
  96. Hook up printer to Apple computer APPLE DIED
  97. Figure out filter program for e-mail DONE LOVING THE OIB
  98. Figure out gardening plan for next year DONE
  99. Box up old files that we need to keep, but don’t need to keep on main floor
  100. Arrange a birthday party for Rob in 2011
  101. Figure out tennis tournament schedule and get Rob going on it PARTIALLY DONE

Art Bucket Tutorial - Light

Okay, I could so do this for my scrapbook and stamping stuff, clever idea and a great tutorial


This bucket will hold all of the cute girl's art supplies so when it's time to craft you can just pull out the bucket and she's good to go. There are pockets all around and most of them are empty just waiting to be filled. I got the idea here at a blog called Kotori. She used a bucket tool belt but I wanted mine to be a little cuter and the belt was a little more than I was willing to spend.


I used a plain canvas type fabric for my cover and I started by tracing around the bottom of my bucket and then adding some seam allowance. I also cut a rectangle that was wide enough to fit around the widest part of my bucket. I made sure it was long enough to extend from the bottom of the bucket up to the top, over and down to the bottom again.


I sewed up the sides of my rectangle and slipped it inside my bucket to see how it fit. I wanted the cover to fit nice and snug so I checked the fit a lot. I thought a rectangle would work well because my bucket seemed really straight up and down, I was surprised just how much I ended up needed to cut off my original rectangle though, the slant was subtle but definitely there. I placed the fabric in my bucket and then pinned the excess fabric so I could move my seam in where necessary. I did this a bunch of times until my cover finally fit how I wanted and then I cut the excess fabric off the width leaving my length the same.


I would do one thing differently next time, the circle is going to fit the inside of the bucket which is smaller than the outside of the bucket which meant my circle was too big and I had to trim it, next time I would trace the outside and not add any seam allowance. That extra size on the outside will become the seam allowance and the circle will fit the bottom.


I next pinned my circle onto my tube of fabric and sewed it together (a photo!)


At this point it looked like this.

I wanted the cover to stay snug on the bucket so I made a casing at the bottom and inserted some wide elastic. I pulled the elastic as I went so everything is cinched into place. You can see in the picture above the little hole where my handle goes (I removed it before I started), I marked that hole and then made a button hole. I did the same on the other side so my handle could slip back into place (but I didn't put the handle on until my pockets were finished).


From this point I made my paintbrush pockets on the inside of the bucket (such a pain but it's like making a crayon roll), I then put pockets on the outside. I made my pockets poof out a bit by not sewing them flat, I would pin one side and then lay the pocket flat but before pinning I'd move the second side an inch or two closer to the pinned side. I'd make a little pleat on the bottom to give it the space to put stuff inside. I did that all the way around the bucket making as many pockets as I had room.


"

napkin fever and a feeler

Option number two is exactly what I was looking for, although the others are good as as well.

napkin fever

However, several of you asked for directions on how I sew my cloth napkins so I thought that might be a better post instead. And besides, if you're inside during a blizzard it will help you pass the time. (two birds with one stone!) Here are 3 quick ways to whip up your own set of cloth napkins.

For all the versions, You will need cotton or linen fabric. Your choice...it should be something easy to launder and something you'd want on your table. You can cut your fabric to the size that works for you and your family. Standard cloth napkins come in a variety of sizes...12, 14 or 16 inch square seem to be the most popular.

Version one:
This is the one I use almost exclusively. You'll use one piece of fabric for each napkin. Cut your fabric to the size you prefer and iron under all edges 1/4 of an inch.
Then go back and iron them all again folding them over another 1/4 of an inch. (This hides your raw edge inside the seam.).
Using your sewing machine sew all the way around; pivoting at each corner.
(If you want a really sharp, professional mitered corner then follow the directions on this tutorial.) Press and enjoy.

Version two:
This version yields a thicker, reversible napkin. This is how Larissa made the napkins that she sent me. Cut two pieces of fabric the same size. You'll be using two pieces for each napkin. With right sides together, pin around the edges. Sew 1/4 inch seam all the way around leaving an opening for turning.
Clip your corners and turn right side out. Press, rolling your seams to get them flat. Now, topstitch around the edges closing your opening as you go.
Press and enjoy.

Version three:
This version is the one my mom made and used when I was growing up. It takes a bit more time but it looks really nice once you've finished. For this version, a woven fabric such as a homespun works really well.
In order to tell if you have a woven fabric look at both sides...it should look the same on both sides. Most cotton prints have one side that is the obvious right side. With homespuns, both sides are identical because the design is in the color of the thread so both sides are the same. Homespuns are also woven more loosely and they fray better. Cut your fabric for the size napkin that you desire. You'll only be using one piece for each napkin.
Sew all the way around your piece about 1/2 inch to 3/4 inch with a straight stitch. The bigger the seam allowance, the more fringe you'll get.
Now, using a straight pin, start fraying the edges removing the horizontal threads. (Grab a comfy seat...this part takes a while) Fray until all four edges are done...this results in a great edge that won't come undone because your stitching holds the remaining fibers in place.
Now that you're done, use those beautiful napkins!!! I just throw mine in the wash with my towels and fold them when they come out of the dryer. I don't even bother with pressing them...we just load them back in the drawer for the next meal.
So here's where I want to see what you guys think...there's been some interest in doing a cloth napkin swap. Courtney and I've been talking about it so, I'm putting a feeler out there to see who else is interested. I'm thinking that swapping sets of 6 handmade cloth napkins would be pretty practical. Let me know what your thoughts are...are you interested? Once I see what the interest is, I'll post that here and we'll go from there....sound good?

And enjoy your week...however snowy or clear it turns out to be.
"

Monday, April 11, 2011